Inquiry
Form loading...

10 Tips for Choosing the Best 4060 UV Printer?

Choosing the right 4060 Uv Printer can feel simple until the first test print reveals hidden limitations. A compact machine may fit neatly beside your workbench, yet struggle with uneven boards, reflective acrylic, or long production runs. The best choice depends on more than resolution and advertised speed. You need to examine printhead quality, UV lamp performance, ink adhesion, software control, maintenance access, and after-sales support.

Industry trainer Daniel Wong offers a practical reminder: “A UV printer should match your daily materials, not just your showroom expectations.” That advice matters when comparing machines with similar specifications. A printer that produces sharp logos on coated phone cases may perform poorly on glass, wood, leather, or textured panels. Ask for physical samples. Inspect small lettering, white ink density, gradient transitions, and curing consistency under normal lighting.

Budget matters. So does downtime.

This guide presents 10 practical tips for choosing the best 4060 Uv Printer for custom products, signage, and short-run manufacturing. It considers workspace size, operating costs, print accuracy, workflow speed, and operator experience. Some recommendations may appear obvious, but they are easy to overlook during a sales demonstration. I have also included points that deserve honest reflection, especially when a lower purchase price hides expensive ink waste or difficult maintenance.

A perfect machine does not exist. The right one delivers dependable results for your materials, workload, and realistic production goals.
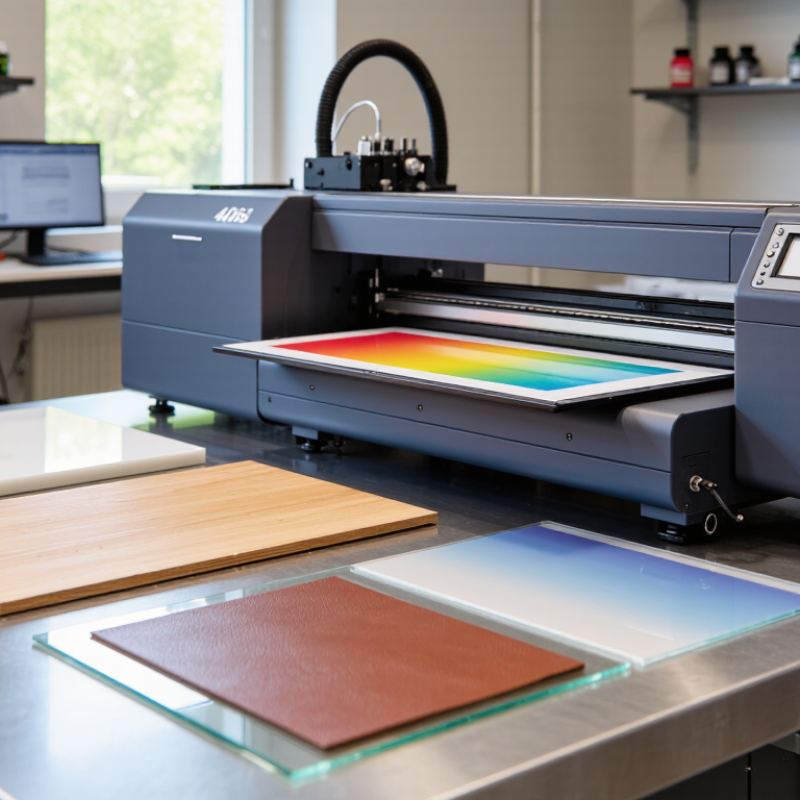
10 Tips for Choosing the Best 4060 UV Printer?

Define Your 4060 UV Printing Requirements

Before choosing a 4060 UV printer, define what you will print each week. Measure your largest products, not your average ones. A small sign, phone case, acrylic panel, or wooden box may need different settings. Record each item’s length, width, thickness, and surface texture. My first estimate was wrong because I measured finished products, not packaging space.

Tip: Match the printer’s working area to your real products. Leave room for positioning and edge checks.

Decide whether you need flat-color graphics, fine text, white ink, or raised effects. White ink can improve results on dark materials, but it may require more cleaning and careful circulation. Ask how quickly the printer reaches production-ready output. Speed numbers can look impressive, yet daily setup, curing, and maintenance often reduce actual productivity. Request a sample using your artwork and material.

Tip: Test the details you sell, not a supplier’s easiest sample.

Your workspace also matters. Check power requirements, ventilation, noise, temperature, and available table space. Confirm software compatibility and operator training before purchase. Keep a maintenance schedule, even when production is light. I sometimes underestimate cleaning time, especially after small jobs. That habit can create avoidable print defects. Choose support based on response quality, spare-part access, and clear technical guidance. A lower price may become expensive when one unresolved fault stops production.
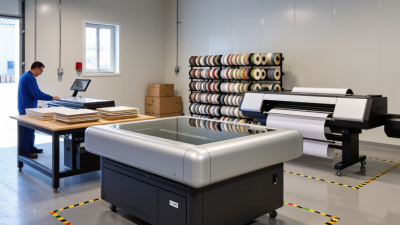
Compare Print Quality, Speed, and Material Compatibility

A 4060 UV printer should be judged by output, not attractive specifications.

The 400 × 600 mm bed suits signs, phone cases, plaques, and small panels. Inspect gradients under a 5000K light. Skin tones should look smooth, while small black text must remain sharp. A 2023 report from Smithers identifies quality consistency as a major investment driver in digital printing. That matters more than a single impressive sample.

Speed needs practical testing.

Ask for a timed print using your real artwork, including white ink and varnish. Manufacturer claims often measure draft mode only. Too fast. A 4060 printer may slow significantly on layered white ink. Record completed sheets per hour, cleaning time, and curing stability. The FESPA Print Census reports that improving productivity remains a leading concern among print businesses, but speed without reliable registration creates waste.

Material compatibility deserves equal attention.

Test acrylic, glass, coated metal, wood, leatherette, and flexible plastics before purchase. Surface energy, coating, and heat sensitivity can change adhesion dramatically. The International Organization for Standardization’s ISO 2836 testing approach highlights the importance of resistance evaluation for printed surfaces. Rub samples after curing, then check moisture and scratch resistance. I would not trust one successful sample. Ask for documented adhesion results, ink safety information, and a repeatability test across several days.

Evaluate UV Ink Systems, Curing Performance, and Safety

10 Tips for Choosing the Best 4060 UV Printer

When evaluating a 4060 UV printer, study the entire UV ink system, not only its color range. Ask whether the ink flows consistently through the dampers, lines, and printheads. A reliable system should produce sharp text, smooth gradients, and stable white ink coverage. Request test samples using your actual materials, such as acrylic, coated wood, glass, or aluminum. Real samples reveal problems that brochures often hide.

Tip: Check ink circulation carefully. White ink can settle when the machine remains idle. Agitation or circulation helps, but it must be gentle and consistent. During a practical demonstration, inspect nozzle checks after several hours. I have found that a beautiful first print proves very little. Long-term stability matters more.

Curing performance deserves equal attention. UV lamps should cure ink evenly across the full 4060 platform, including edges and dense white layers. Touch the printed surface only after following the manufacturer’s curing procedure. A surface that feels dry may still have weak adhesion. Check for scratching, odor, cracking, and color changes after curing. Safety also requires enclosed light paths, effective ventilation, protective interlocks, and clear maintenance instructions. Operators should use suitable eye and skin protection when exposure is possible. Do not assume every setup is equally safe; room conditions and cleaning habits affect risk. Before purchase, request service records, written safety guidance, and a realistic maintenance schedule. Some advice sounds convincing but lacks practical detail.

Review Software, Maintenance Needs, and Technical Support

10 Tips for Choosing the Best 4060 UV Printer

Software deserves practical testing before purchase. Ask for a live demonstration using your artwork, not a showroom file. Check RIP compatibility, white-ink layering, color management, nesting, and production queues. FESPA’s 2023 Print Census surveyed more than 1,000 print professionals across 83 countries. It identified workflow efficiency and automation as major investment priorities. That finding matters because a fast printer can still lose hours through poor file preparation. Test transparent graphics, small text, and repeated jobs. Watch for confusing menus. I have seen operators reject useful equipment because daily software felt unnecessarily difficult.

Maintenance affects real production costs. Inspect how easily staff can reach the printhead area, wiper, capping station, and ink lines. Ask for the recommended cleaning schedule and average consumable usage. Smithers’ digital printing research continues to show strong market growth, but growth does not remove maintenance demands. UV ink can cure inside neglected components. Ask whether automated cleaning records are available. They help prevent missed routines. Still, automation is not magic. A careless operator can ignore warnings for weeks.

Technical support should be measured, not promised. Request response-time targets, spare-parts availability, remote diagnostics, and technician coverage in your region. Keypoint Intelligence’s wide-format research repeatedly links uptime and workflow reliability with purchasing decisions. Ask for anonymized service data, including first-visit resolution rates. Check training materials before signing. A short lesson is not enough for complex color workflows. Support quality may vary after installation, which is uncomfortable but worth considering. Speak with current users, and ask how problems were handled during a busy deadline.

10 Tips for Choosing the Best 4060 UV Printer

Recommended evaluation priorities for software, maintenance, print performance, and technical support.

Use these percentages as a practical scoring framework when comparing 4060 UV printers. Give extra attention to RIP and color-management software, routine maintenance access, ink and printhead compatibility, training, warranty coverage, spare-parts availability, and response times from technical support. A printer with strong output quality but difficult maintenance or limited support may create higher operating costs over time.

Calculate Total Costs and Verify Supplier Reliability

A 4060 UV printer may fit a small workshop, but its purchase price reveals only part of the investment. Calculate the full cost before comparing suppliers. Include the printer, printheads, UV inks, varnish, software, shipping, taxes, installation, and training. Add electricity, ventilation, cleaning supplies, and routine maintenance. Small costs accumulate quickly.

Estimate ink consumption using real sample files, not ideal sales data. Ask how much ink a typical phone case, sign, or panel requires. Include wasted material from setup, failed prints, and color adjustments. Downtime also has a price. If a replacement printhead takes three weeks, delayed orders may cost more than the repair itself. My early estimates would have missed this. That is worth questioning.

Supplier reliability needs evidence. Request a written warranty, service response times, spare-parts availability, and a clear list of exclusions. Ask for a live printing test with your own materials. Inspect fine text, gradients, white ink coverage, and adhesion after curing. Ask for contact details of recent customers, then verify their experience independently. A polished video is not enough. Ask for proof.

Compare at least three itemized quotations. Numbers expose gaps. A cheaper machine may exclude training or essential software. Check whether technical support is available in your working hours and language. Also confirm the supplier’s business history, documented maintenance procedures, and ability to provide updated manuals. Leave a contingency budget for the first six months. Real production is rarely as smooth as a demonstration.

10 Tips for Choosing the Best 4060 UV Printer? — Calculate Total Costs and Verify Supplier Reliability

No. Selection Dimension What to Verify Practical Data or Calculation Standard Cost Impact Warning Sign
1 Confirm the Actual Print Area Ask for the effective printable width and length, not only the model number. Check the maximum material thickness and the usable area after margins. A 4060 format normally refers to an approximately 400 × 600 mm class of print bed. Confirm whether the real printable area is at least 380 × 580 mm and whether the listed size includes clamps or non-printable edges. A larger usable area can reduce the number of jobs and setup time. Only a vague “4060” label is provided without a dimension drawing.
2 Evaluate Print Quality Request unedited samples containing fine text, gradients, solid colors, transparent white, and small photographic details on the materials you use. For production planning, compare test output at 600 × 600 dpi and 1,200 × 1,200 dpi modes. Inspect text below 3 mm, banding, color registration, and white-ink density under normal viewing distance. Poor quality creates reprints, material waste, and customer returns. Only highly edited photographs or samples printed on unknown materials are shown.
3 Check Throughput Honestly Compare production speed using the same resolution, pass count, ink coverage, and curing settings. Separate headline speed from sellable-quality speed. Use square-meter output as the common unit. A realistic test should record setup time, printing time, curing time, and cleaning time rather than quoting only the carriage movement speed. Higher usable throughput lowers labor cost per item. The supplier quotes speed without resolution, pass count, or coverage conditions.
4 Measure Ink Consumption Request measured ink usage for color-only, color-plus-white, and high-coverage jobs. Confirm whether cleaning cycles are included. For preliminary budgeting, use 10–20 mL of UV ink per m² for ordinary coverage and model white ink separately because dense white layers can materially increase consumption. Every 1 mL/m² change equals $0.10–$0.18 per m² when ink is priced at $100–$180 per liter. Ink cost is quoted only per bottle, without a measured mL/m² figure.
5 Verify Material Compatibility Test acrylic, glass, coated metal, wood, leather-like sheets, plastics, and other intended substrates. Check adhesion after curing and after 24–72 hours. A successful test should include scratch or tape adhesion checks, surface cleanliness requirements, primer needs, maximum thickness, and any restrictions on heat-sensitive materials. Primer, surface treatment, and failed adhesion tests add direct operating cost. The supplier promises universal printing without written substrate limitations.
6 Calculate the Full Purchase Cost Add the printer, freight, import charges, installation, training, software, electrical preparation, ventilation, spare parts, and initial ink. Illustrative planning example: printer $4,500 + freight and duties $700 + setup and training $600 + electrical and ventilation preparation $500 + starter ink $400 = $6,700 before production begins. The delivered and installed cost can be substantially higher than the advertised machine price. A low price excludes shipping, software, training, or commissioning.
7 Estimate Three-Year Operating Cost Use your expected annual print volume, ink price, electricity rate, maintenance budget, replacement parts, and labor time. Example model: 500 m²/year × 15 mL/m² × $0.12/mL = $900/year for ink; 1.2 kW × 1,000 hours × $0.15/kWh = $180/year for electricity; maintenance budget = $600/year. Example three-year operating cost: $5,040, excluding labor and substrate. Add it to the $6,700 setup cost for an estimated $11,740 three-year total. The quotation focuses on purchase price but gives no consumable or maintenance assumptions.
8 Inspect Maintenance Requirements Confirm daily, weekly, and monthly procedures for capping, wiping, white-ink circulation, nozzle checks, flushing, and printhead protection. Require a written maintenance schedule and a list of recommended spare parts. Budget separately for dampers, wipers, filters, pumps, lamps, and other service items. Regular maintenance reduces downtime and protects expensive printheads. No written maintenance manual or spare-parts list is supplied.
9 Verify Supplier Reliability Check the legal business identity, operating history, service location, warranty terms, response time, replacement-part availability, and references from comparable users. Ask for at least two independently verifiable customer references and a written warranty specifying coverage, exclusions, labor, shipping, and expected response time. Reliable support can reduce lost production during faults and setup problems. Only chat-based support is available, or warranty terms are verbal.
10 Run a Pre-Purchase Acceptance Test Use your own files and substrates before payment or final acceptance. Record print dimensions, color mode, white-ink performance, registration, speed, and cleaning behavior. Document pass/fail criteria in writing. Include a repeatability test with multiple copies and verify that the delivered machine matches the tested configuration. A documented acceptance test lowers the risk of expensive disputes and unusable equipment. The supplier refuses customer-file testing or changes the configuration after approval.
Cost formula: Total Cost of Ownership = Purchase Price + Freight and Duties + Installation and Training + Infrastructure + Initial Consumables + Three-Year Ink Cost + Three-Year Electricity Cost + Three-Year Maintenance and Parts Cost. All monetary figures above are generic planning assumptions in USD and should be replaced with verified quotations, local utility rates, and measured production data.

Recommended comparison method: request identical test files, substrates, resolution settings, ink coverage, and delivery terms from every supplier. Compare the resulting cost per finished square meter rather than comparing the machine price alone.