How to Position a UV Printer in 2026?
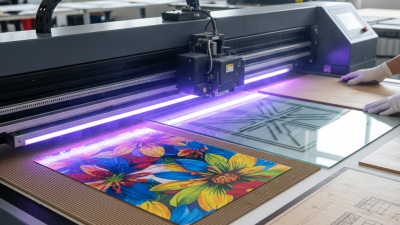
Positioning Uv Printer in 2026 will require more than choosing the fastest machine on a product page. Print businesses must place the printer where workflow, ventilation, material handling, and customer demand meet. A compact UV flatbed may suit a sign studio with limited floor space. A roll-to-roll model may serve a shop producing wall graphics, labels, and flexible displays. The wrong location creates wasted movement, uneven productivity, and avoidable maintenance.
Frank Romano, a respected printing educator and industry analyst, has often emphasized this practical principle: “Technology should serve the application, not define it.” That idea remains useful in 2026. A printer positioned beside the finishing table can shorten handling time. A printer placed near a loading door may simplify board delivery, but dust and temperature changes can affect performance. Small details matter.
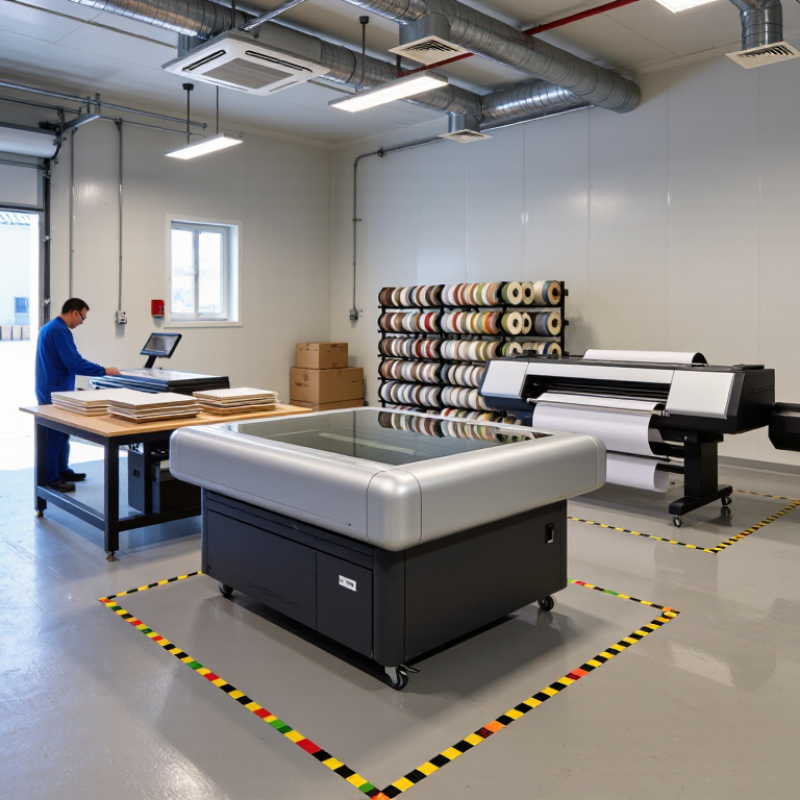
Measure the room before comparing specifications. Mark the printer’s footprint with tape. Leave space for ink replacement, media loading, cleaning, and emergency access. It feels basic. It is often missed.
This guide will examine how to position a UV printer around real production conditions, including substrate flow, operator safety, electrical access, and future expansion. It will also question a common assumption: the most expensive placement is not always the most professional one. A strong decision combines manufacturer guidance, installer experience, and documented site measurements. Conditions vary. Recheck them before installation.
Define the UV Printer’s Purpose, Workspace, and Production Requirements
How to Position a UV Printer in 2026?
Define the UV Printer’s Purpose, Workspace, and Production Requirements
Positioning a UV printer begins with its purpose, not the empty corner in your workshop. Decide whether it will handle signs, packaging samples, décor panels, or short-run custom parts. Each use demands different media sizes, curing speeds, and handling space. A printer for flat boards needs a wider loading path than one for small objects. Measure the largest planned substrate before choosing its final location.
Leave clear access around the machine for cleaning, calibration, and safe maintenance. Keep the print bed level and away from direct sunlight, dust sources, and heavy vibration. A stable floor matters more than attractive surroundings. Place media storage close enough to reduce carrying, but not where sheets block ventilation or emergency access. Check power requirements, temperature stability, and airflow with a qualified technician before installation.
Production requirements should shape the entire workflow. Allow room for artwork preparation, printing, curing checks, drying, and finished-goods inspection. I once underestimated unloading space by half a meter. That mistake slowed every job. Measure twice. Record actual operator movements during a trial run. If the printer serves several people, document loading direction and cleaning routines near the workstation. The best position may not be the most compact one. It should reduce handling, protect print quality, and leave enough room when production becomes unexpectedly busy.
How to Position a UV Printer in 2026?
Define the UV printer’s purpose, workspace, and production requirements before selecting its location.
Purpose
Choose the printer category according to the intended work: small-format personalization, sheet-based signage, or direct-to-object production.
Workspace
The planning footprint includes the standard media size plus room for loading, unloading, maintenance access, and operator movement.
Production Requirements
Higher-volume work requires a larger media path, uninterrupted access to the machine, controlled airflow, and a layout that supports safe material handling.
Planning reference: A3 and A2 are ISO 216 paper sizes. The 610 × 1220 mm category represents a common compact flatbed working area. Workspace values are layout allowances, not machine specifications.
Choose a Stable Location with Proper Space, Ventilation, and Accessibility
A UV printer needs more than an empty corner. Choose a level, solid floor that can support the machine without noticeable vibration. Leave enough space around every side for loading materials, cleaning printheads, and checking cables. A crowded workspace slows routine maintenance and increases accidental contact with wet surfaces.
Ventilation matters, even when the room feels comfortable. Keep the printer away from direct sunlight, heaters, open windows, and dusty production areas. Stable temperature and humidity help inks behave consistently. Good airflow should remove odors without blowing dust directly across the printing zone. Avoid placing the machine beneath a ceiling vent. That small detail can cause trouble.
Tips: Mark the printer’s footprint with tape before installation. Leave a clear path for large boards and service access. Check the power outlet nearby, but keep cables away from walkways. Use a sturdy table only when its load rating is confirmed. Test the floor for vibration by walking beside the planned position. If the surface moves, reconsider it. I would also inspect the location at different times of day; sunlight and traffic often reveal problems missed during setup. A careful position may seem slower at first, but it makes daily operation safer, cleaner, and more predictable.
Set Up Power, Networking, Lighting, and Environmental Conditions
How to Position a UV Printer in 2026?
Set Up Power, Networking, Lighting, and Environmental Conditions
Positioning a UV printer starts with power, not floor space. Use a dedicated circuit sized by the printer’s installation manual and local electrical code. Avoid extension cords and shared outlets with compressors or heaters. Power fluctuations can interrupt curing and corrupt print jobs. A surge protector helps, but it cannot replace proper grounding.
The U.S. Department of Energy reports that LED lighting uses at least 75% less energy than incandescent lighting. Still, brightness matters more than energy savings. Place neutral, high-CRI lights above the bed. Glare can hide banding and uneven gloss.
I once trusted a bright ceiling lamp and missed a registration error. That was an expensive lesson.
Keep the printer near a wired network point when possible. Stable Ethernet reduces transfer delays and protects large files from wireless interference. Leave clear access around service panels, ink systems, and ventilation paths. Measure the room before delivery. Small spaces often look efficient, but maintenance becomes awkward.
Keep temperature and humidity steady within the printer’s specified range. Sudden changes can affect ink flow, media adhesion, and curing consistency.
The World Health Organization’s 2021 Air Quality Guidelines set annual PM2.5 exposure at 5 µg/m³. Use filtration and ventilation where airborne particles or odors become noticeable. Do not place the machine beside an open door, dusty cutter, or direct sunlight.
The setup may seem acceptable on day one. Recheck it after a week of real production.