A1 A2 Visual Positioning UV Printer Tips for Beginners?
In the realm of printing technology, mastering the A1 A2 Visual Positioning UV Printer can be daunting for beginners. Industry expert John Smith once said, “Success with UV printers comes from understanding the nuances of placement and setup.” His insights echo the challenges many face when starting in this field.
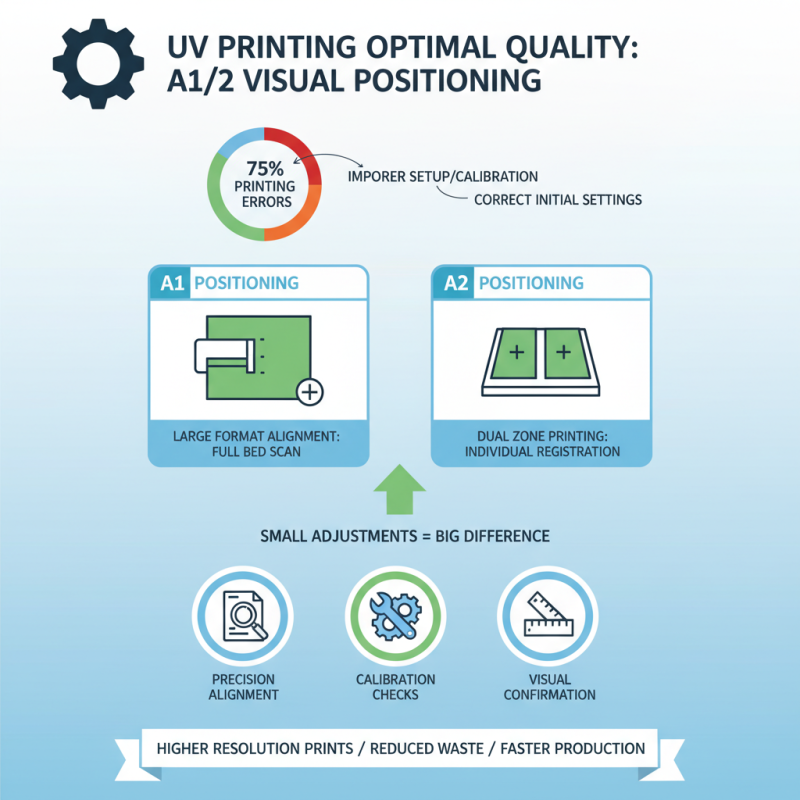
Every detail counts when using an A1 A2 Visual Positioning UV Printer. Beginners often overlook aspects like printer calibration and media selection, which play a vital role in quality output. A slight misalignment can ruin an entire print job. Practicing and experimenting with these settings is essential.
Yet, there is room for improvement. Many new users struggle with their first prints, feeling overwhelmed. It is common to face inconsistencies and errors. Reflecting on these experiences can lead to growth and better results. Embracing this learning curve is crucial for mastering the A1 A2 Visual Positioning UV Printer.
Understanding A1 A2 Visual Positioning UV Printers
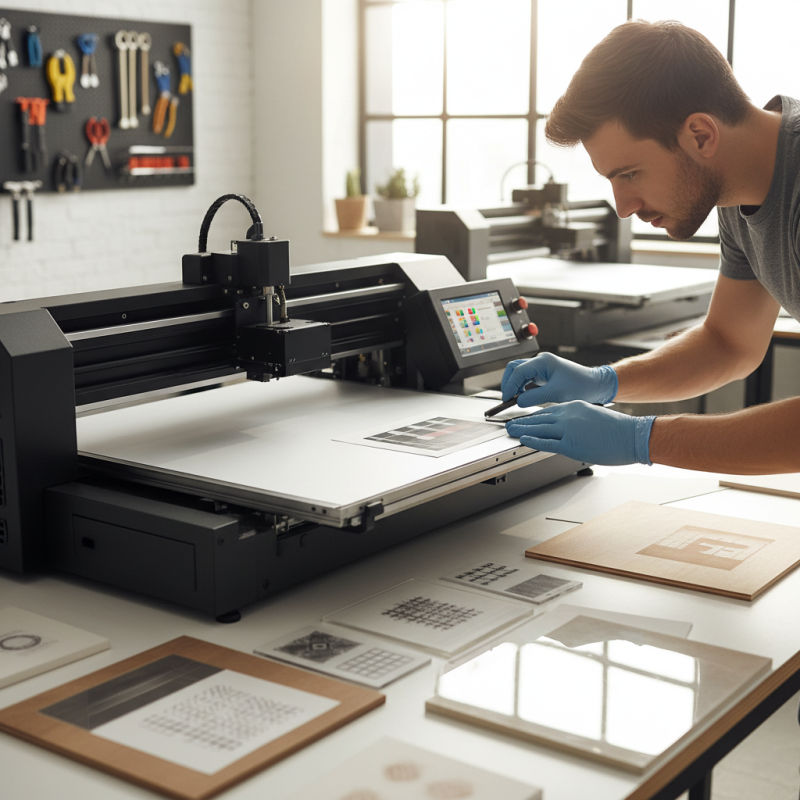
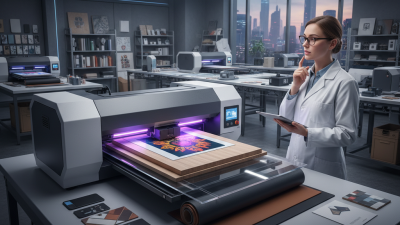
Understanding A1 A2 Visual Positioning UV Printers requires both technical awareness and practical experience. These printers use UV light to cure ink, producing vivid prints on various surfaces. Users can target materials like wood, metal, or glass, offering flexibility for creative projects. However, achieving perfect alignment can be challenging. Beginners may struggle with the visual positioning system, leading to misaligned prints.
Adjusting printer settings is crucial. Mistakes in resolution can lead to poor quality. It’s essential to experiment with the positioning guides. Learning the layout of your workspace helps. Take time to measure and visualize print areas carefully. Small errors can compound quickly, resulting in disappointing outputs. Consider setting up a mock test to build confidence.
Maintenance is another area needing attention. Regular cleaning of the printheads is vital. Neglect can lead to clogs and uneven printing. Keeping an eye on ink levels also prevents surprises mid-job. If a project seems off, don’t hesitate to pause and reassess. Reflection and adjustment in practice are keys to mastering this technology. Even seasoned users learn from imperfections, refining their approach over time.
Key Features of A1 A2 Visual Positioning UV Printers
A1 A2 visual positioning UV printers boast several key features that make them ideal for various printing tasks. One prominent characteristic is their high precision. These printers can accurately position prints, ensuring that designs align perfectly on different media. This precision is crucial for detailed images, as even slight misalignments can ruin the overall look.
Another important feature is their versatility. They can print on a myriad of surfaces, including metal, glass, and wood. This adaptability opens doors for creative projects. However, beginners may struggle to optimize settings for each material. It requires practice and experimentation. There’s a learning curve that can sometimes lead to unsatisfactory results.
Durability is also noteworthy. The UV ink used in these printers dries quickly and is resistant to fading. This means prints can endure wear and tear better than traditional inks. Nonetheless, maintaining print quality may require adjustments over time. If resolutions drop or colors shift, it’s important to recalibrate the printer. Understanding these features helps beginners avoid common pitfalls and enhance their printing experience.
A1 A2 Visual Positioning UV Printer Features Comparison
Essential Preparation Steps Before Printing
Before diving into printing with an A1 A2 UV printer, preparation is vital. According to a recent industry report, nearly 70% of successful print projects come down to thorough planning. Start with selecting the right substrate. Each material has unique characteristics. Understanding these is crucial. For example, not all substrates adhere well to UV inks. Some may require special treatments.
Cleaning the printing surface is another key step. Dust and debris can ruin a print job. Studies indicate that 45% of print defects arise from improper surface preparation. Check your inks and ensure they are compatible with your chosen materials. This kind of attention to detail can save time and resources.
Consider the environment too. Temperature and humidity play significant roles in UV printing. Ideally, keep the workspace at a stable temperature around 20-25°C. High humidity can cause problems with ink adhesion. Be aware of these factors. They may seem minor, but they can lead to unexpected results. Preparing well can lead to high-quality prints and fewer disappointments.
Common Challenges and Solutions for Beginners
When starting with A1 A2 visual positioning UV printers, beginners often face several challenges. One common issue is achieving accurate alignment. Misalignment can lead to poor print quality or even wasted materials. To tackle this, always ensure the surface is clean and flat before beginning your print. A level print bed can make all the difference.
Another challenge is understanding the right ink settings. New users may struggle to find the correct balance between saturation and drying time. Too much ink can cause smudging, while too little results in faded prints. It's vital to experiment with small samples before committing to larger projects. Adjust the ink flow and check the results regularly.
Furthermore, many beginners overlook the importance of regular maintenance. Neglecting the printer can lead to clogged nozzles or inconsistent results. Cleaning the printer regularly may feel tedious, but it ensures smoother operation. It's a step that shouldn’t be neglected. Reflecting on these issues can help solidify understanding and improve future projects.